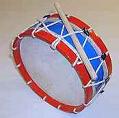
from this jpeg of a tabor drum
using only Bam Workshop 1.
Introduction
Download the necessary files
Create a work folder
Opening Bam Workshop and saving a file
Setting up a frame
Working with the graphic
Conclusion
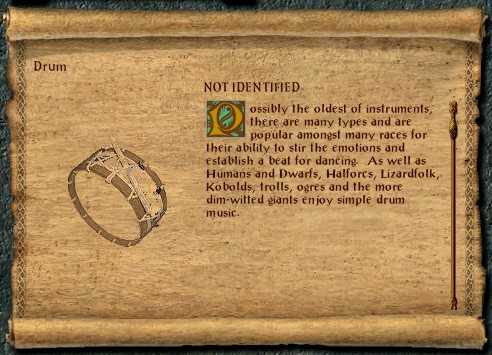
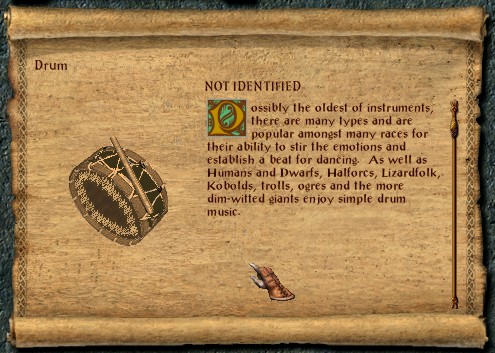
Welcome to the tutorial on how to build a description bam for beginners. In this tutorial I will show you how to produce this description Bam of a drum:

from this jpeg of a tabor drum
using only Bam Workshop 1.
This tutorial is aimed at someone who knows very little at producing graphics but would like to produce a custom description bam for an item. I'm assuming you know how to create items and add them to the game.
In this tutorial I have re-sized the jpeg of the Tabor Drum for you. Description Bams have a maximum size of 120px by 120px. If you need to re-size a jpeg of your own then you can use the Stretch and Skew facility in Microsoft paint to get the right size. The image menu will give you that option. You can check the size using the attributes menu. Experimenting with paint for 10 minutes or so before starting this tutorial will give you a head start as the toolbars in both applications are almost identical.
Step 1 - Download the necessary files
You will need:
Create a work folder that will hold your description Bam and then copy tabor.jpg and the lute.bam from the bam kit into your work folder.
Now that we have all the files we need we can get to work.
Step 3 - Opening Bam Workshop and saving a file
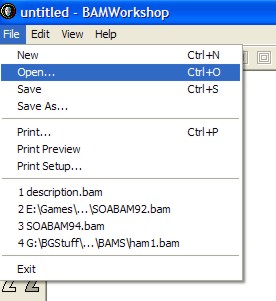
Open up Bam Workshop and select file in the top left hand corner. Select open.
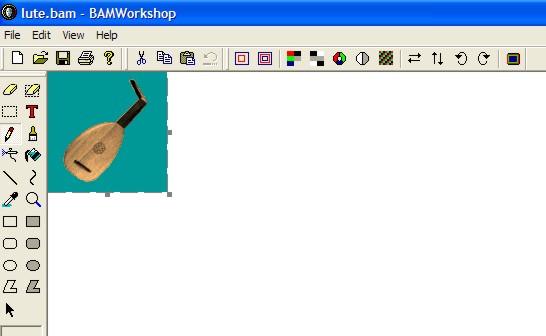
Navigate to your working folder and select lute.bam. You should now see the followng screen:
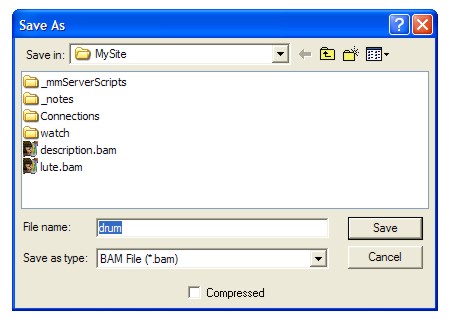
Now save the file to your working directory. Call it drum for now. You can always change the name later but keep it below 8 characters in length.

Now we need to set up the frame area so that we can create our drum. On the right hand side you will see a panel titled Sequences. Click in the white area to make sure it is active (where I have shown the red dot below).
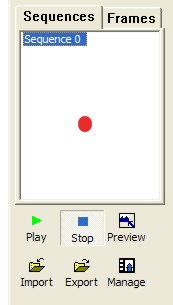
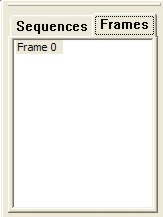
Now click on the Frames tab next to the Sequences tab and you should see Frame 0.
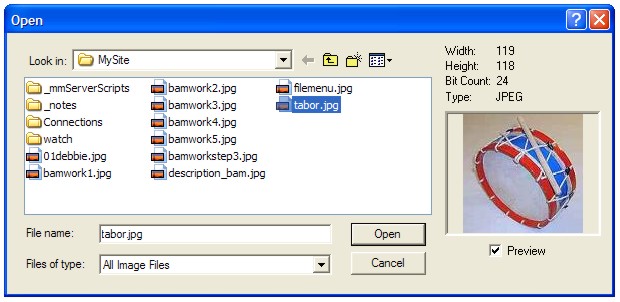
Select the import button below the Frames panel. This will bring up a dialog box. Select tabor.jpg from your working directory and then click Open.
All being well you should have an image in the main area and an additional frame in the frame panel. Don't be concerned that the tabor looks nothing like the original jpeg. This is intentional as it has been forced to assume the pallete of the existing graphic.
NOTE: At this point you may want to export your frame using the export button below the Frames panel as a gif so that you can produce the graphic using Microsoft Paint instead of Bam Workshop. If you choose to do that then export the Frame as a gif and then jump to step five. The interfaces for both applications are very similar so you shouldn't have a problem following the instructions. When it comes to getting the graphic back into Bam Workshop for conversion load the clearpallet.bam instead of the lute.bam and follow the instructions in this step (step 4).
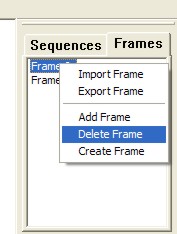
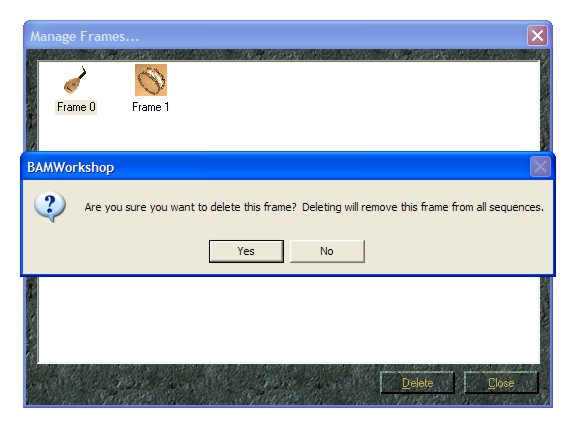
Select Frame 0 in the Frames panel. Right click it and select Delete Frame
To get rid of the lute frame completely select the manage button from below the Frames panel and a dialog box will appear. Select the icon of the lute and yes to the confirm box after you selcet teh Delete button.
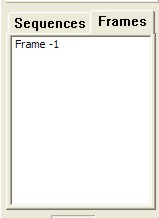
The Frames panel should show frame -1.
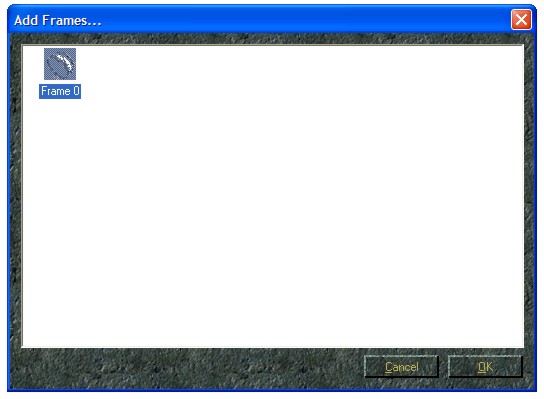
Right click in the frames panel again but this time select add Frame and from the dialog box that appears select the drum icon.
Two frames will be showing in the Frames panel. Select the top one, right click it and select delete Frame.
Thats the frames sorted out we can now start on our drum but first save your work. There is an undo in Bamworkshop 1 but it takes you right back to the beginning so its a good idea to save your work under different filenames as you go.
Step 5 - Working with the graphic
In the toolbar area on the left side select the magnifier button.
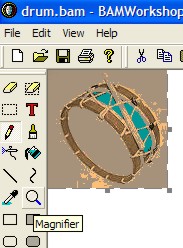
Increase the magnification to x6 so the drum is large enough to work with.
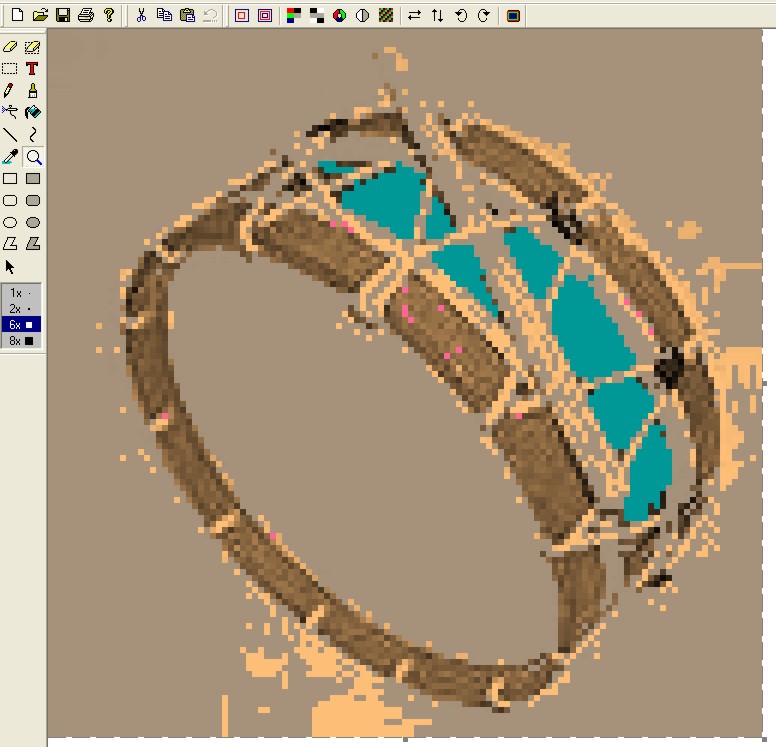
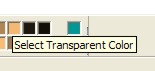
Make sure the transparent fill color is selected from the pallete at the bottom of the screen.
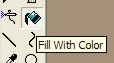
Select the Fill with Color tool button on the toolbar.
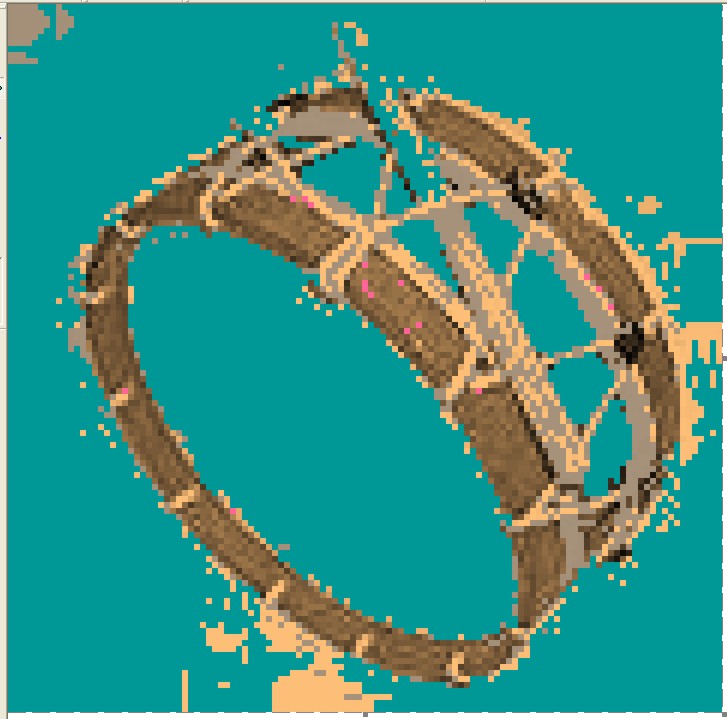
Using the Fill with Color tool select the areas of the graphic where there are large areas of color and fill them using the transparent color like so.
In the toolbar there are three other tools you need to get familiar with.
The Brush tool

The Pen tool

The Line tool

Each tool may have additional options the brush tool has some size options which you can try.

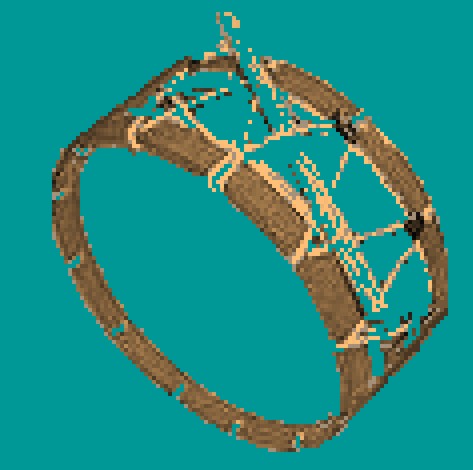
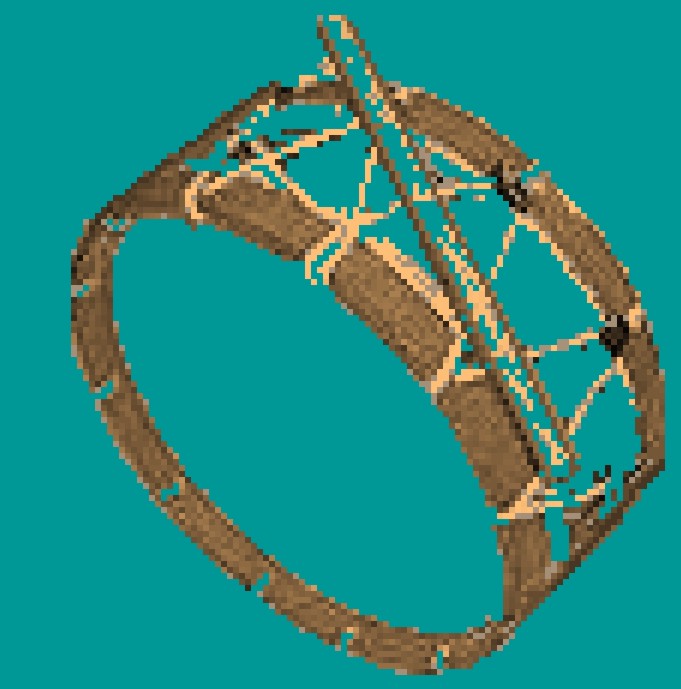
Using these tools with the transparent color tidy the image until you have something similar to this.
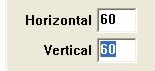
At this stage its probably a good idea to get the bam into an item and try it in the game. Just below the frames panel you need to set the vertical and horizontal values to 60. This will ensure your Bam is positioned correctly in the game.
Once you have your item in the game it should look like so.
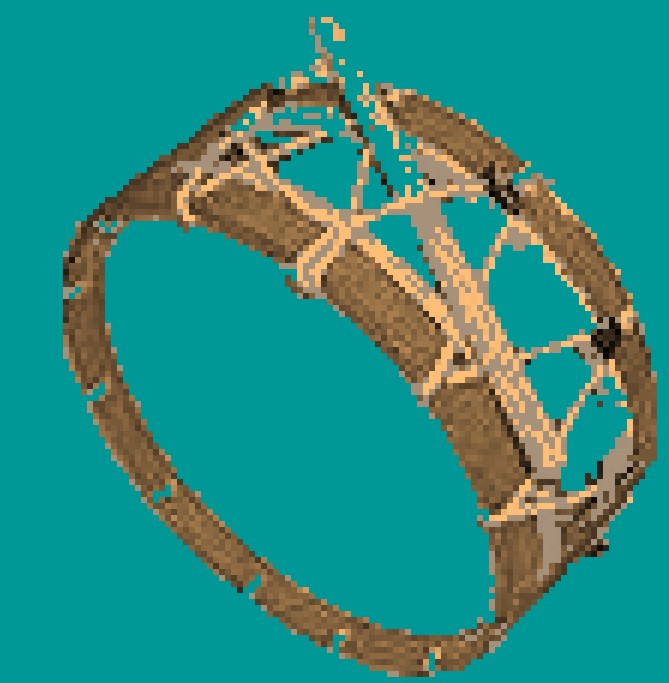
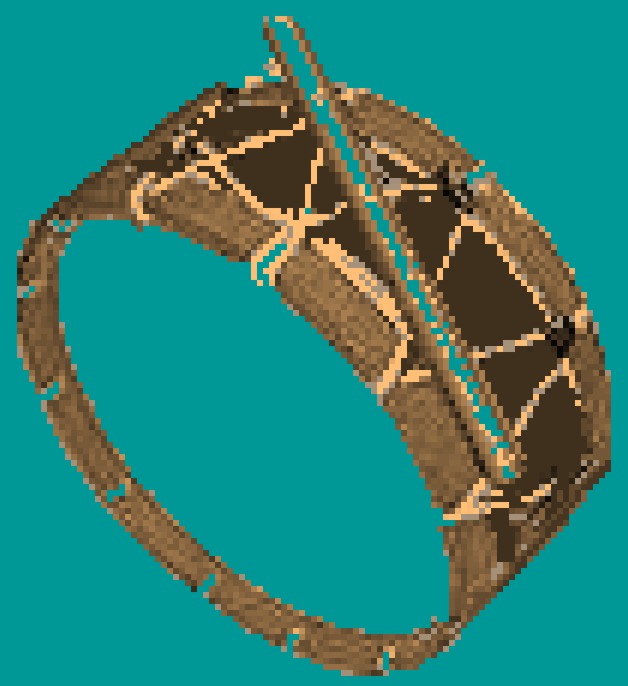
The bam is almost finished but there are still grey areas on the drum and the drum has no depth to it. So go back to Bam Workshop and continue tidying up the drum until you get to this stage.
Using the color picker

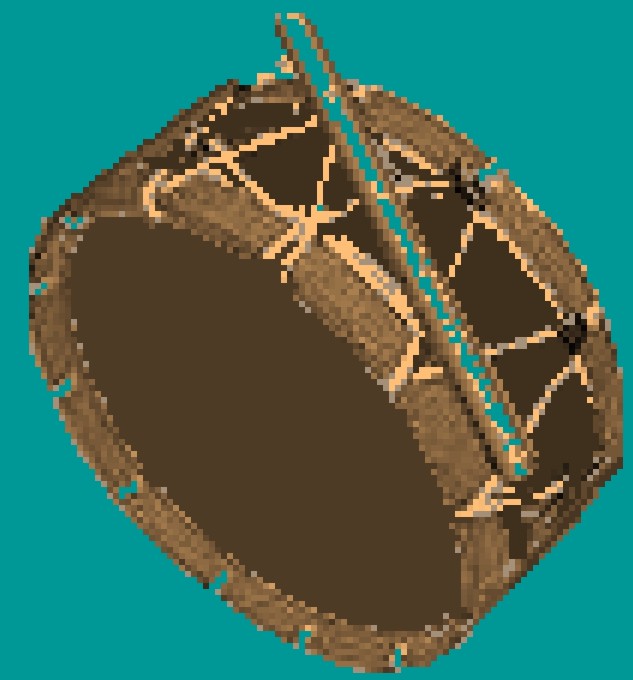
select a dark brown color from the drum itself then select the line tool. Draw a line along the edge of the stick to give it some definition. Select a lighter color and then draw a line alongside the other. This will give depth to the stick. The drum should now look like this.
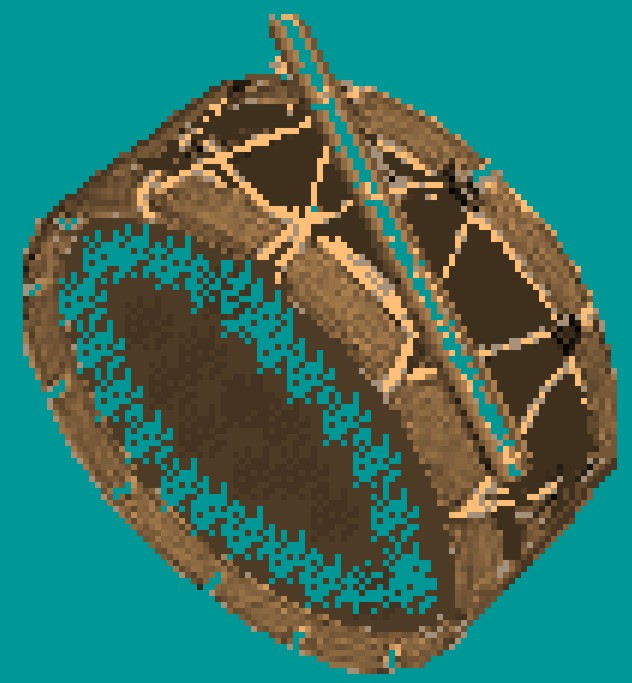
Time to give the body of the drum some color so using the color picker select a color of your choice. Here I have selected a dark color. Using the fill color tool fill in the areas of the body so you end up with something like this.
OK we are almost done but the skin of the drum has yet to be completed. So select another color for the skin. Here I have chosen a dark color again and using the fill tool fill the large area where the skin should be. The drum should now resemble this.
Using the color picker select the transparent color again and then select the airbrush tool.

Now very carefully work your way around the edge of the skin. Be careful as this tool can cover a large area very easily.

Keep going until the complete skin is done.
The bam is complete. Get it into your item and test it. It should look like so.
There you have it. Description bams made easy.
I hope you managed to complete the tutorial. Using these techniques you will be able to build description Bams quite easily. If you have an item Bam then you can easily produce a custom description bam for it simply by importing it into Bam Workshop. Bam Workshop 2 also gives similar results but I have found working with magnified views difficult. The best way by far is to use Microsoft Paint to produce the graphic and Bam Workshop for the conversion. Whatever you use, as a beginner you do not need to get into Paint Shop Pro, Photoshop or any other top of the range application. Good ole Paint or Bam Workshop will do.